Create and Configure Your Webhook
To use Webhooks with Tensorlake, make sure you have created a project on Tensorlake Cloud.It is important to disable CSRF protection for the endpoint if the framework you use enables them by default.
Create a webhook
Go to the project that you want to create the webhook for, and click into the Webhooks tab.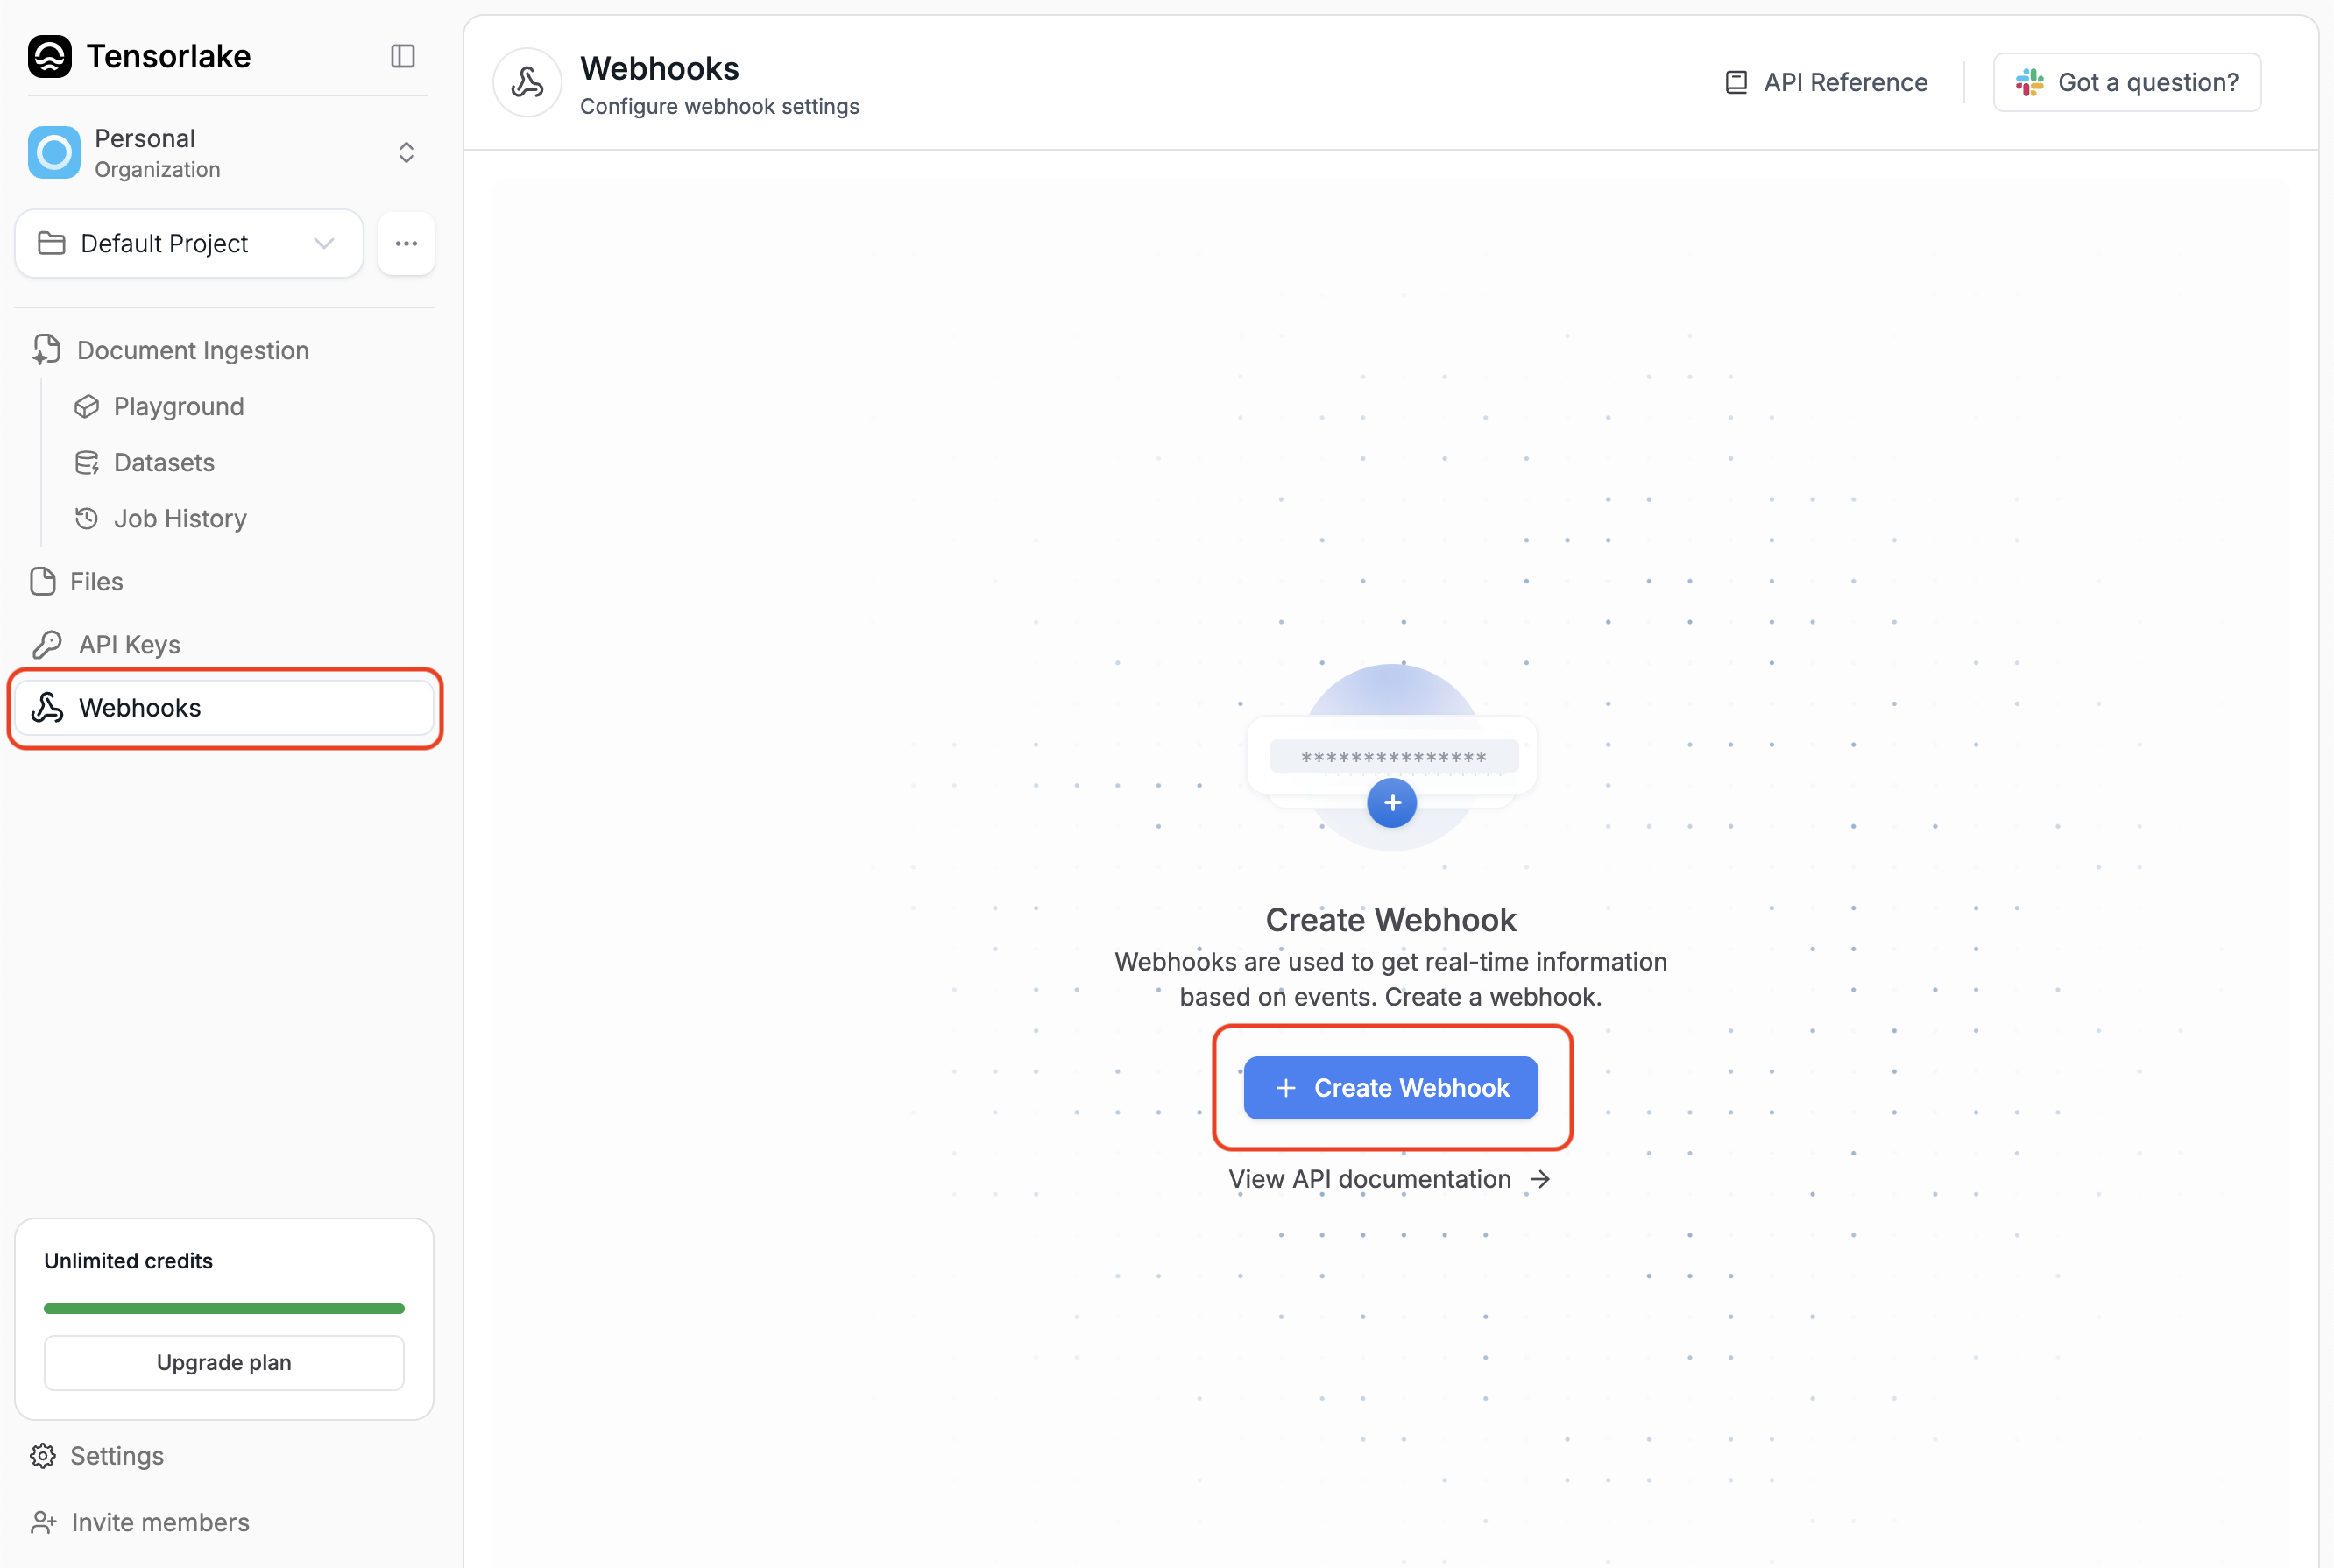
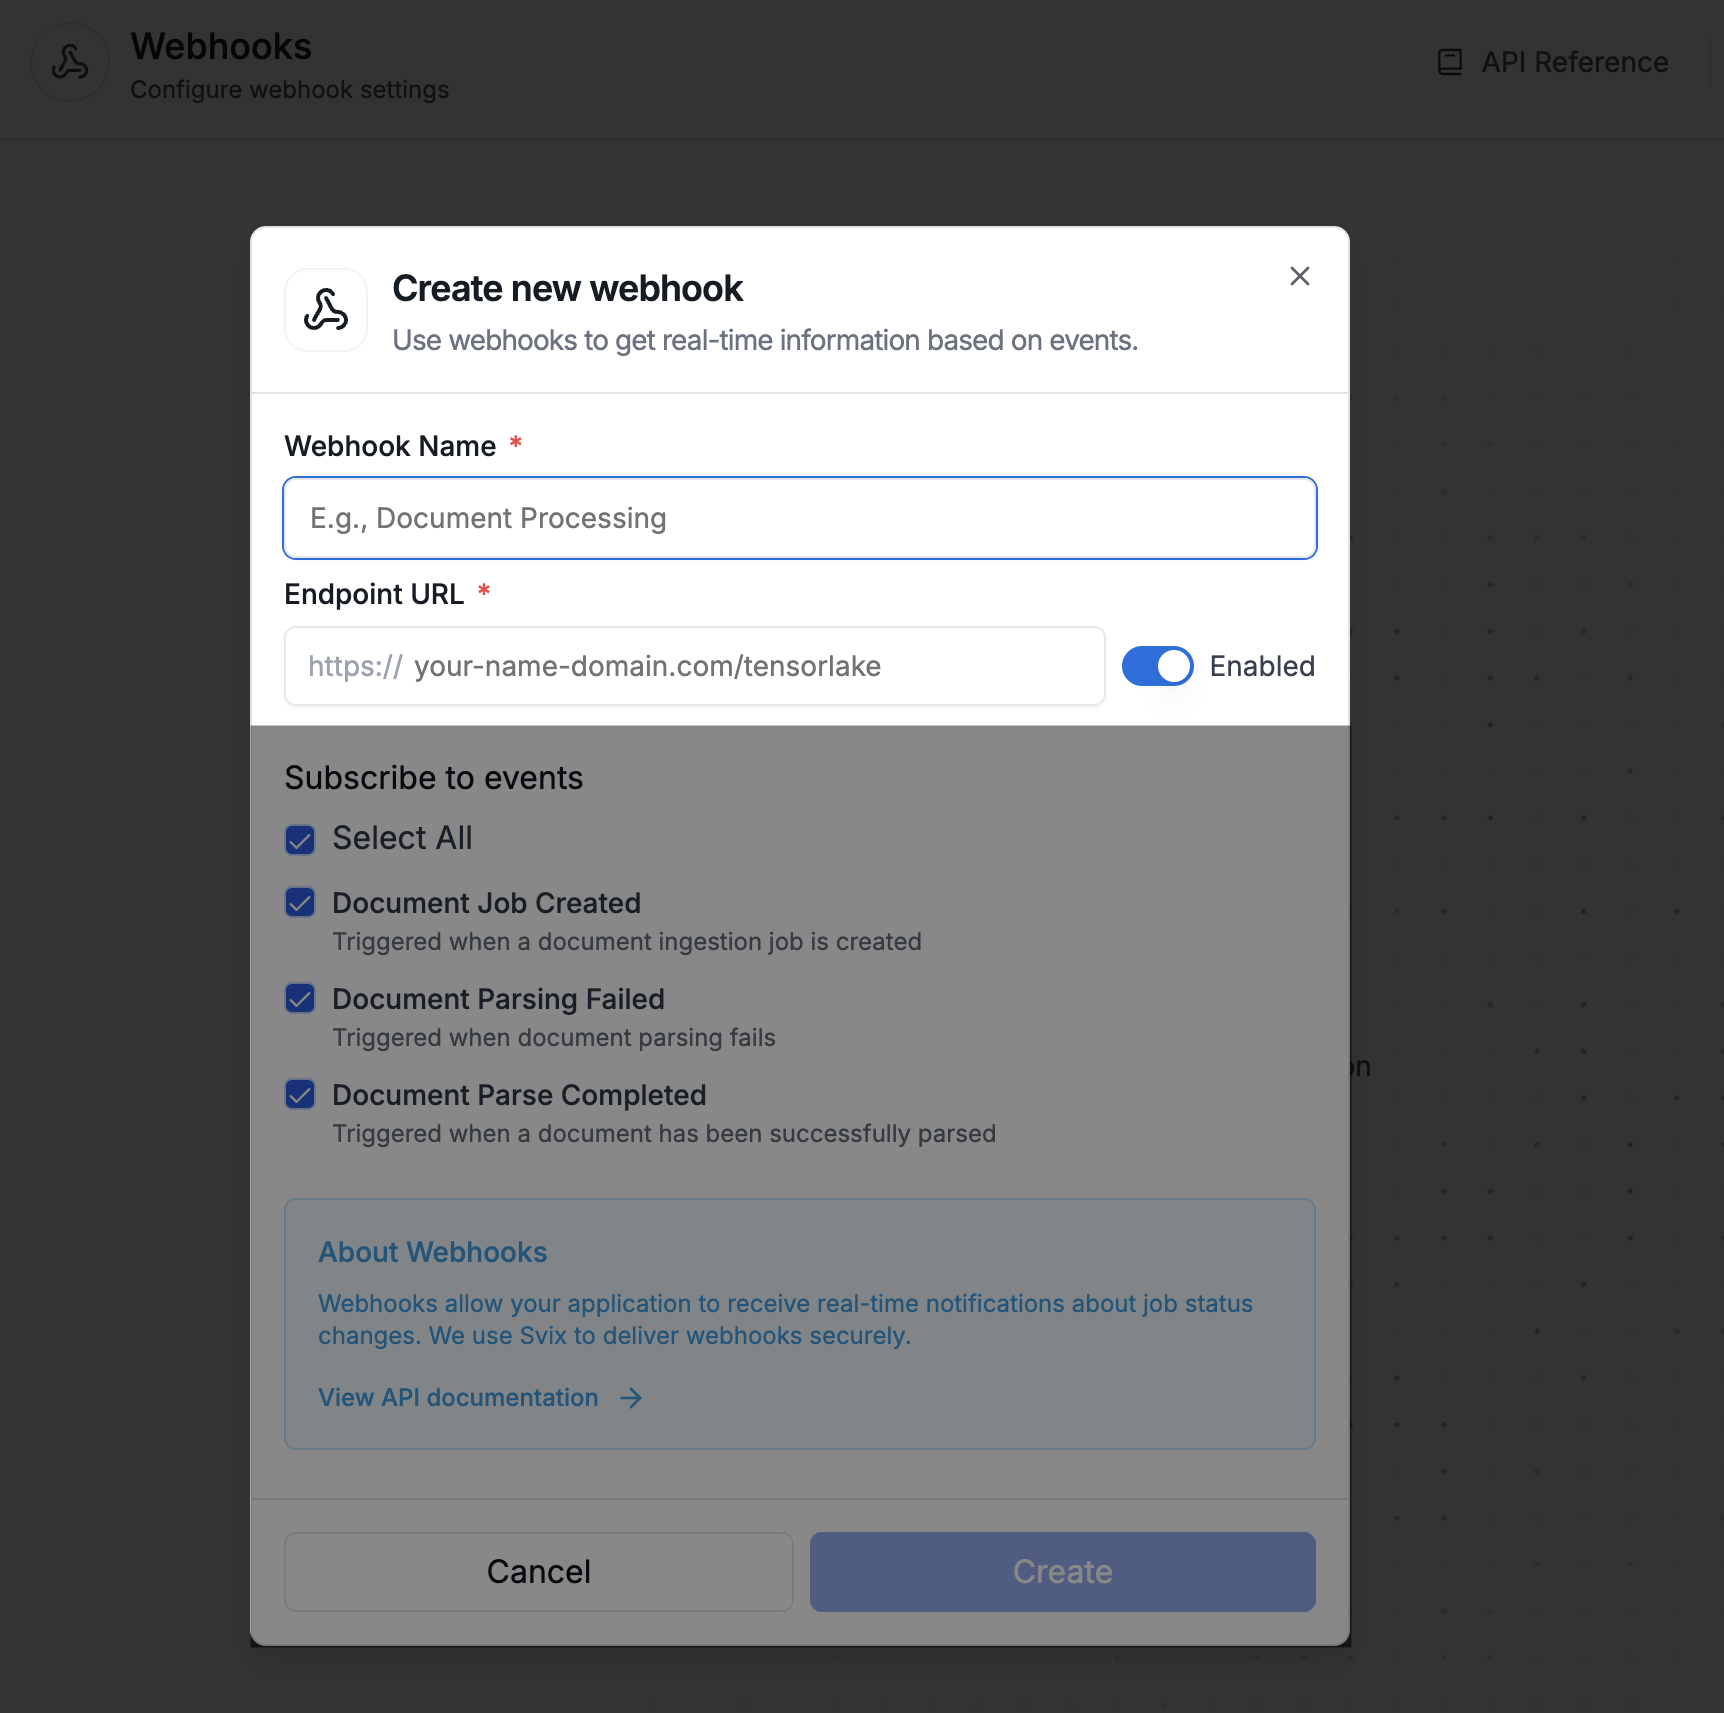
Configure access for your webhook
Configure your webhook by selecting the event types that you want to listen to.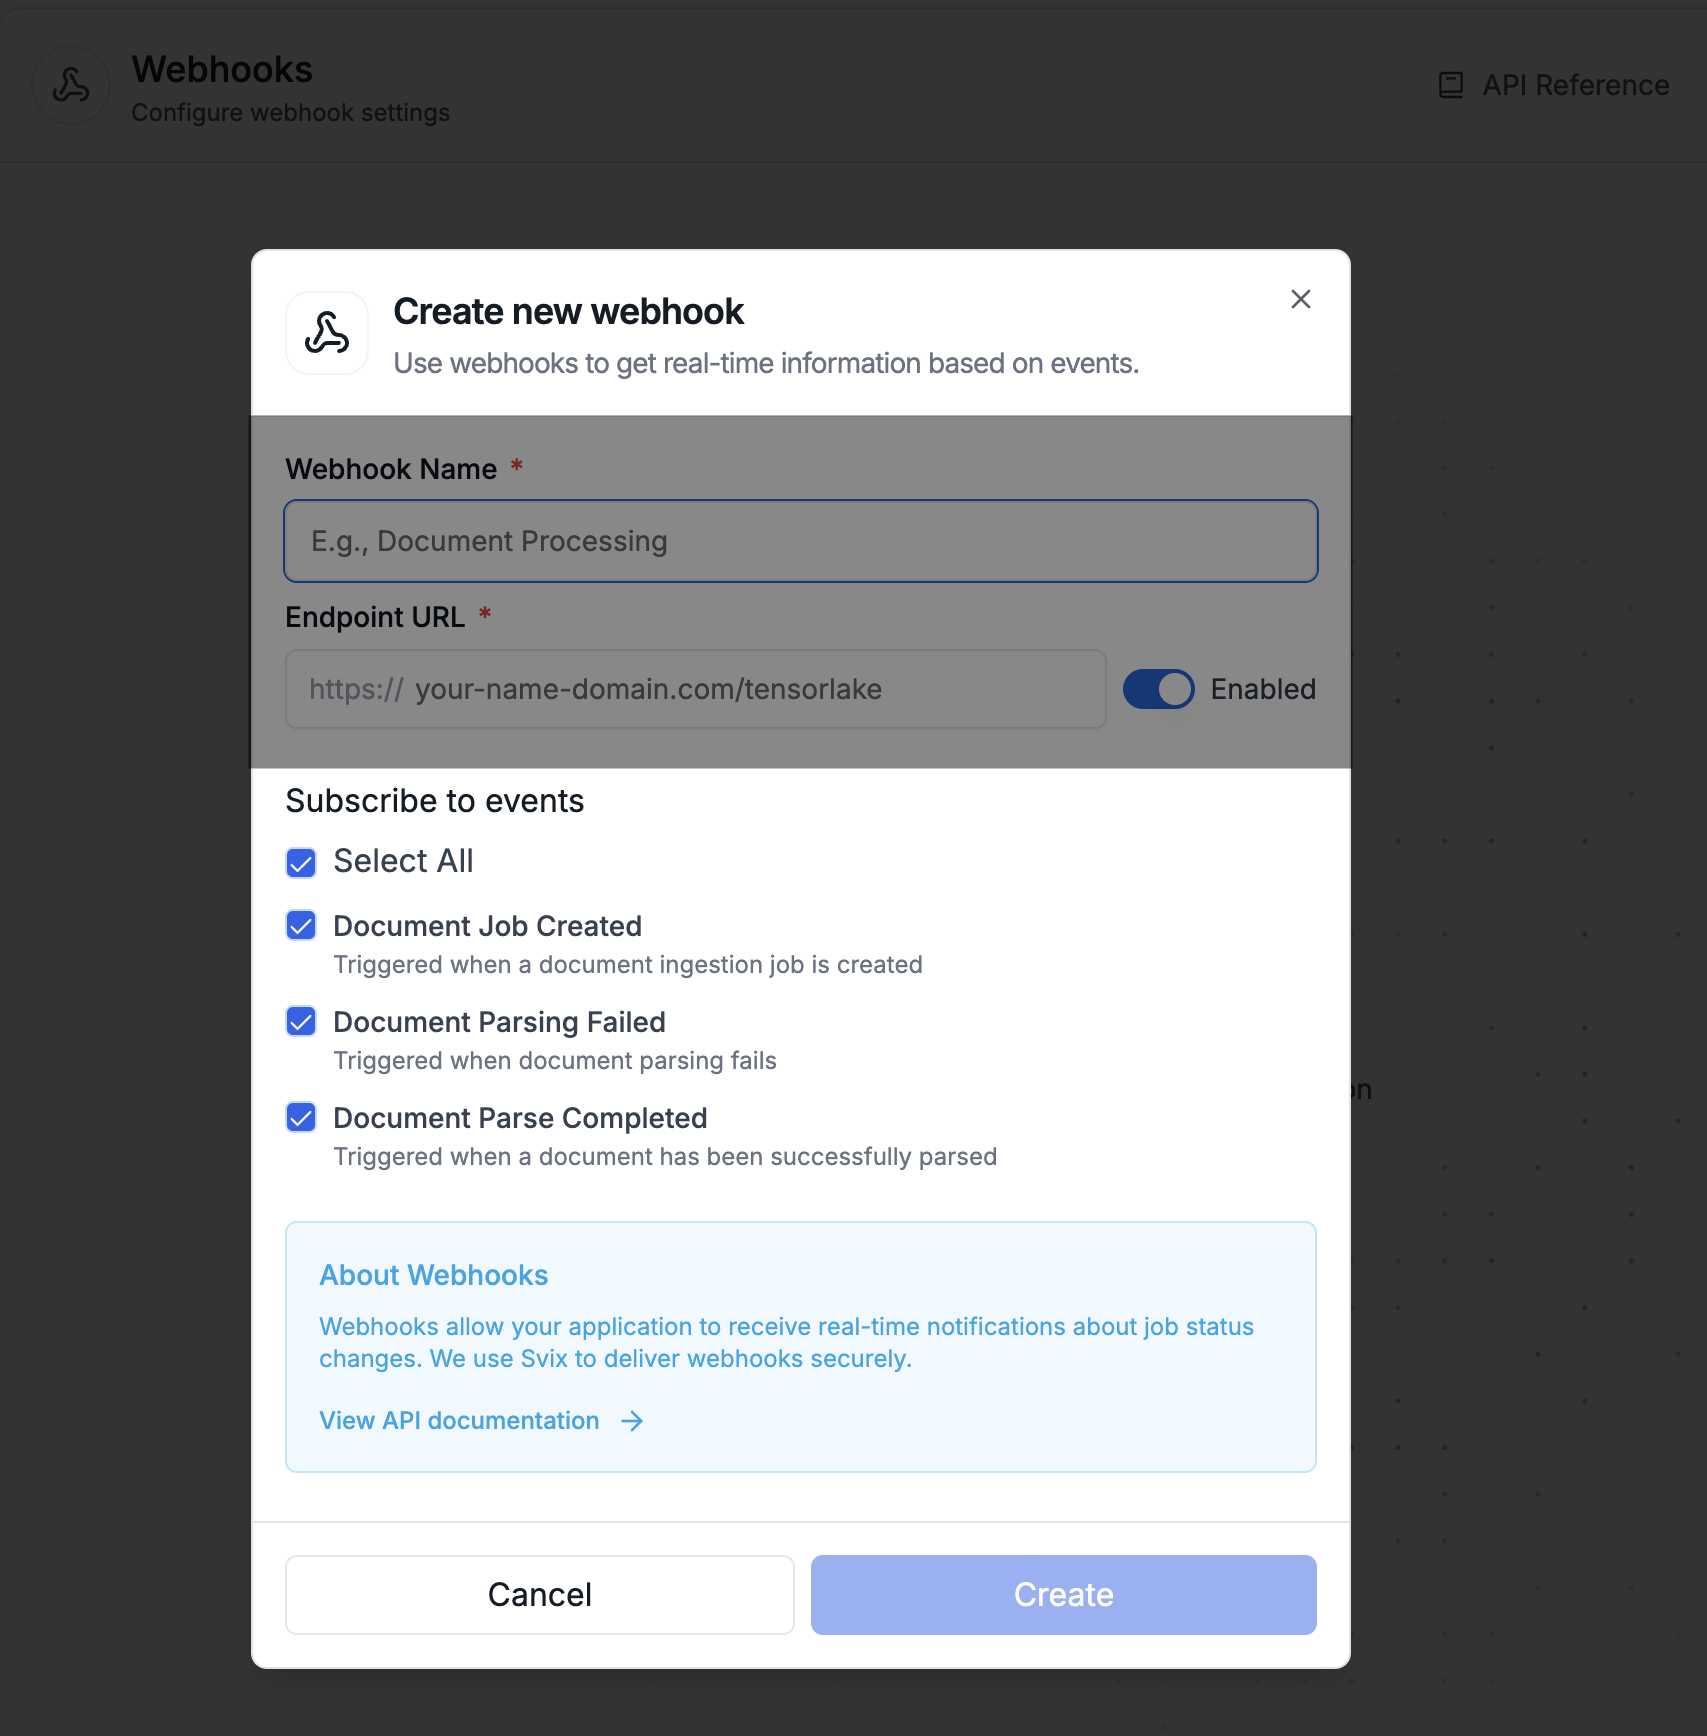
tensorlake.document_ingestion.job.created: Triggered when Tensorlake receives the request to parse a document and kicks off the parsing.tensorlake.document_ingestion.job.failed: Triggered when a parsing job fails.tensorlake.document_ingestion.job.completed: Triggered when a parsing job succeeds.
Understand the Webhook Payload
The payload of the webhook will depend on the event type received. The payload will be a JSON object with the following structure:- Job Created
- Job Failed
- Job Completed
Workflow Payloads
When all functions of an application finish running for a given input:success— The function finished running successfully.failure— The function failed to finish running.
Test Your Webhooks in Tensorlake Cloud
We have a UI to test webhooks. After creating a webhook, select on the event type you want to test.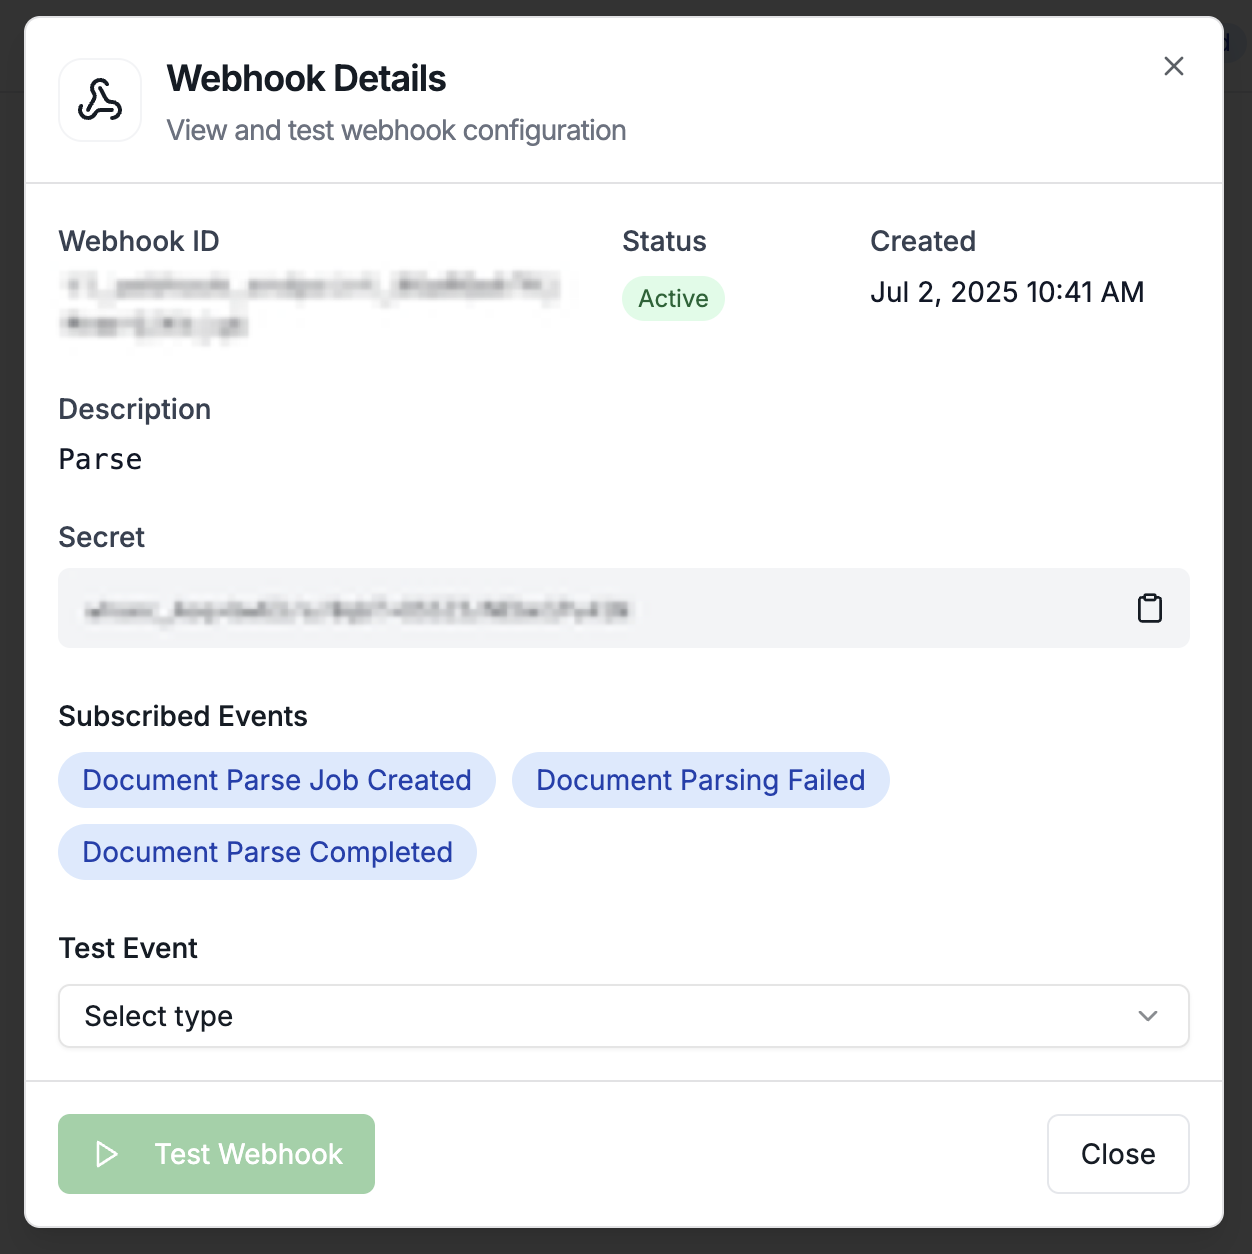
Secure your Endpoints with Signature Verification
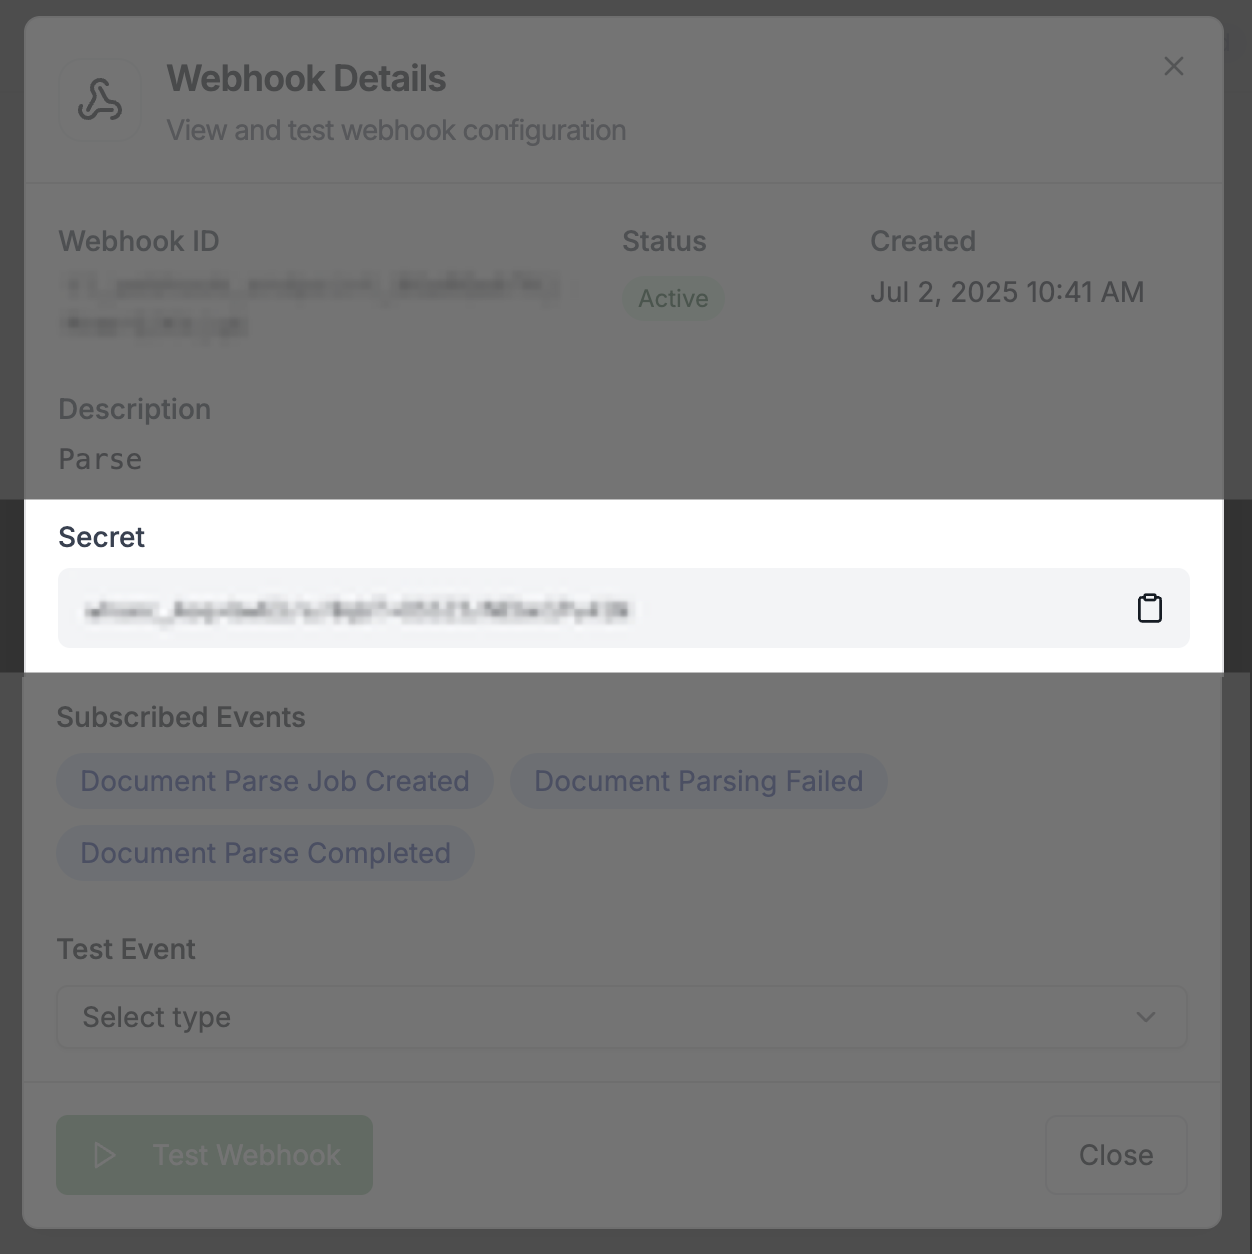
To get your webhook secret:- Navigate to your project’s Webhooks tab in Tensorlake Cloud
- Click on your webhook to view its details
- Copy the webhook secret displayed in the interface
- Extracting the signature from the
svix-signatureheader - Computing the expected signature using your webhook secret
- Comparing the computed signature with the received signature